Friday, December 20, 2013

The Everloom Game walkthrough

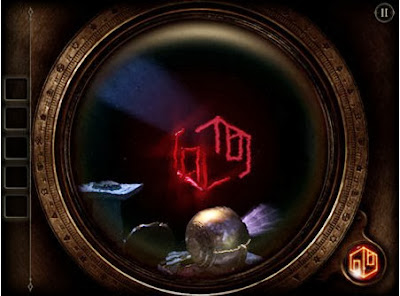
The Everloom is another pixel adventure fantasy game from Lucas Paakh. In this game your objective is to save a world not of your own from the dark plans of some evil cultists. You can only do just that by interacting with other dreamers in that world and obtaining items that apparently are the keys to stop the cultist from carrying out their evil plans.

This game does not only have a story line that is cool and interesting, but it can also present a real challenging task. So to help you out, I have prepared here a written guide which will walk you through the things that needs to be done in the game if you are to complete it.

The Everloom Game walkthrough.

1. The first thing you'll need is to find the string. You can get it from Fatts McGruf located in the area left of the Weaver.
2.Next, get the scythe from Toadpad in the village area above the Weaver.

3. Get tethers from Draco located at the airship area right of the Weaver past where Izabel is and all the way down..

4. Now that you have your strings tied into tethers, you can now harvest the little water cactus and turn them into balloons. You need 13 pieces of balloons which you will give to Izabel.

5. Izabel will drop a strand of hair. Give it to Cadmus and he will then give you confidence and the answer to the sphinx's riddle. The sphinx is located left of the Weaver.


6. Search for the Bad Cultist above the sphinx behind the trees. Go talk to him even though he is bad and he will give you a key to the fire gate south of the Weaver.

7. How to solve the fire-gate maze: Follow the numbers in the picture below and those marked with X must be avoided.


8. After completing the maze, proceed left and go to the very bottom until you find the meditating sage. He will give you an egg after he is done talking.


9. Go back to the fire gate maze and enter the last teleporter to be taken back to the beginning of the maze. Now go back to the area above the Weaver until you reach the tall building then go left and then up where the Cultist are doing the rituals. Talk to Lazarus to give to him the egg and in return he will let you use his Revealing Eye. Go to the Revealing Eye which is located right of the Weaver then go all the way down and to the left and you will find it hanging around on the cliff there.


10. Find all four fragments of the Ring. The first fragment is just right below the revealing eye. The second is located in a puddle in the pathway to the airship area. The third is on the pathway below the cultists in the area above the Weaver. The fourth and final fragment is on the scenic overlook above the Sphinx.

11. Upon getting the last fragment the ring will be restored. You can now give it to Rich Uptight von Wealthson located left of the Weaver. You will receive money from him.

12. Buy ice cream from the ice cream truck parked on a cliff near the airship.
.

13. Go to Martha by Toadpad in the area above the Weaver. You will get a rock.

14. Head towards the Sphinx and find the switch to open the lighting barrier above the Sphinx and to the right.

15. Head left towards the lighting gate past left of the Sphinx. Solve the blue fire puzzle by simply touching each rune once in a circle.

After that, you just have to run along the wind walk path up to where you came from until the last cinematic scene where the Weaver is holding both you and Lazarus.
The Everloom Game walkthrough

That concludes The Everloom walkthrough which I hope helped you in making progress in the game.

Tuesday, December 17, 2013

The Room 2 Game Chapter 1 Walkthrough with Puzzle Guide

Are you stuck on chapter 1 of The Room 2 game/app by fireproof? Well lucky you, you found this guide. Let me walk you through the chapter 1 and I am sure you'll learn a thing or two on how to solve puzzle and stuff in ch 1.

Right after the tutorial part at the beginning, you will be presented with a puzzle box. You must spin the center spindle around and shift the outer shapes into their respective spots. Line them up correctly then open the box and obtain the lens.

There will be another set tutorial steps that will teach you how to fix your eyepiece then after that get the small hexagonal object.
The Room 2 Chapter 1 walkthrough.

After that, zoom out and look around the octagonal shaped table with the puzzle box you just solved and opened. You will find another hexagonal object on one corner.

Take it and then go check out the other square table.

Place both of the objects into the hexagon shaped dents on this table.
Turn the metal discs so that a hole appears in the center of the table. Take the brass sphere.

Place the brass sphere into the middle of the giant compass on this table (pictured above). Zoom out once and use your eyepiece to see a secret message on the note (it reads: SESWN).

Hold on the center of the compass and spin it so that the arrow goes past the south, then east, then sout, then west and north.

If you did it correctly, the letters SESWN will appear on the tiles below the eye/sphere.

Obtain the medalion. Tap it to examin it up close. Notice the two pieces of it with arrows? Pull them apart using two fingers until the medallion shifts into a tile.


Go back to the octagonal table and check out the box on the middle of it. Put the medallion tile in the hole/dent in the center. It will reveal a lamp.


Grab a hold of the lamp by double-tapping it. Activate your eyepiece to see into the darkness. While you're at that, wiggle the lamp to find a symbol in the background (see picture above).

Wiggle it again twice to be taken to a blind statue holding a small box. Rotate the top part to make the symbol on the box line up.

As the box opens you will see red sticks. Turn the camera around to see a red shape on the background. Finally, line up the red sticks with the shape and that ends our walkthrough for The Room 2 chapter 1.

Friday, December 13, 2013

Feed Us Lost Island cheats

Feed Us Lost Island is yet another flesh eating monster game where you play as the vicious piranha victimizing humans. If you think, you've seen enough human flesh munching, small fish bullying and boat bashing action in all of the previous Feed Us series, think again because the terrifying red piranha is back and is even more hungrier than ever. The game is set in six new worlds across a certain remote island filled with unsuspecting tourists.

You know the drill, just keep on eating and gain more blood to buy upgrades and complete several objectives for more challenge. If you want more fun and you want it quick, you can always use the cheat codes listed below.
Feed Us Lost Island cheats.

TRAVEL - Unlock fast travel in pause menu.
TINY - Become tiny main piranha.
MASSIVE - Become a very large piranha.
EPICJUMP - You jump higher.
POPOUT - Unlock all in the shop except Air Strikes.
APPETITE - 2x more floating meat.
HARDFISH - Classic seeds are invincible.
WARNING - Deactivate warnings.
WAR - Every human throw spears.
PEACE - No humans throw spears.
DEADARMY - Enable human skeletons.
BEAST - Become invincible.
SLOWCOW - Slow down enemies.
To use these codes you must go to career menu by entering a fish barrel or by pressing pause. From career menu proceed to 'extras' and from there you will find where to enter the Feed Us Lost Island cheats I listed above.

Wednesday, December 11, 2013

Escape Action App Walkthrough Solutions

Escape Action by Candy Mobile is probably one of your most loved puzzle game on your Android device right now. Simply because it's fun and challenging at the same time. Not to mention the feel and its overall visuals are far more greater than previous mini room escape games from other developers. But like any other games in the puzzle genre, this game also has it's downside which is giving frustrations because of the difficulty it offers.

The good news is that you can purchase hints and even the master solution for each level through in game coins. But that would mean buying them with real money. So to save you the trouble, I have listed here all of solution from level 4 to 60. Enjoy!

Level 4.
Shake the device.
Pick up the switch.
Press the switch

Level 5.
Just drag the ghosts into the pumpkin.

Level 6.
Adjust the numbers on the door by sliding.
The code is 915.

Level 7.
Shake your device to topple the stacked objects.

Level 8.
Tap the white button to change the numbers and make the code 10, 8, 6.

Level 9.
Pick up the wrench on the floor.
Use the wrench to break the door. Continuously tap the door with the wrench to break it open.

Level 10 challenge room.
Combine the all the hammers.

Level 11.
Form all the triangle's wide side to the pin wheel as if making a frame.

Level 12.
Shake your device to take out the light from the lamp. A key will appear in the drawer. Take it and use it to open the padlock.

Level 13.
Just make the equation true.

Level 14.
Tap each tile to rotate and form a door.

Level 15 Challenge room.
Trick: rapidly tap everywhere to get the points required.

Levl 16.
Make the batten horizontal and keep it still for 5 seconds.

Level 17.
Press the button on the wall.
Remember the numbers and their positions.
Tap wood plates from 1 to 9: 1 (right), 2(down), 3(top left), 4(middle), 5(left), 6(bottom left), 7(bottom right), 8(top), 9(top right).

Level 18.
Adjust the clock by tapping and rotating. Tap small clock when time of big clock match with it.

Level 19.
Drag animal figures to corresponding cages. Top left (panda), top right(kangaroo), bottom left(elephant), bottom right(snake).

Level 20 challenge room.
Shoot all pumpkins.

Level 21.
Tap the pumpkin and destroy all the ghosts by tapping them.

Level 22.
Press and hold the volume down button of your device for 3 seconds.
Escape Action app walkthrough.


Level 23.
Tilt your device to adjust the compass.
Make the green needle pointing to the cross sign on the wall for 3 seconds

Level 24.
Tilt your device to move the ball in the hole. The holes should be filled in the numberic order: 1,2,3,4.

Level 25 challenge room.
Connect dots of the same color and reach 320 points.

Level 26.
Pull down the rope on the roof. Count the amount of fruits(2), smiley(1) and clock(3). Tap buttons on the door: fruit(twice), smile(once), clock(thrice).

Level 27.
Pull down the rope on the roof multiple times to break the door. Come in like a wrecking ball lolz.

Level 28.
Slide wood plates (1 on the floor and 2 on the ceiling) to find the banana. Tap and place the banana to the mouth of the gorilla.


Level 29.
Tap the 1st, 4th and 5th round button to make all the flowers bloom.

Level 30 challenge room.
Wipe the web off the screen.

Level 31.
Balance left and right platform. One solution: 2 smiles and 1 apple.

Level 32.
Tap the blocks on the door to form a hammer symbol.


Level 33.
Pick up the knife. Press the knife in the toolbar and swipe along the cross mark on the door a bunch of times.

Level 34.
Press and hold one finger on the door for 4 seconds.


Level 35 challenge room.
Put the balls into their corresponding holes. I suggest you buy the unlimite hourglass.

Level 36.
Collect three orange balls on the screen. Press the balls in the toolbar. Tilt the device to make balls rolling to the right holes.

Level 37.
Tap the round button to switch the pattern on it. The 2 patterns on diagonal buttons must be the same.

Level 38.
The up arrow is the hint, it means from the bottom up.
Tap the left buttons following this order: boat, people, house, cloud.

Level 39.
Pull down the rope on dangling from the roof. The arrows and the horn are the hints. Press the volume buttons in this order: up, up, up, down, down.

Level 40 challenge room.
Swipe off the leaves and collect the buttons.

Level 41.
Use your finger to cut the map to 2 pieces. Tap the drumns quickly in the order indicated on the paper.: 2nd drum (3 taps), 4th drum (1 tap), 1st drum (2 taps), 3rd drum (1 tap), 1st drum (1tap).

Level 42.
Adjust the clock by tapping and rotating. Make the clock time match with your current device's time and wait for 4 seconds.

Level 43.
Tap left buttons to switch numbers. The number indicate differences between the 2 pictures on the right. The top number is 2, the bottom number is 3. Press the switch.


Level 44.
Clear off the leaves using your finger. Tap the color buttons multiple times according to the amount of the flowers of the same color. Top left: 1 tap. Top right: 1 tap. Bottom left: 1 tap. Bottom right: 3 taps.

Level 45 Challenge room.
Get 50 points fruit ninja style!

Level 46.
Tap on the map. Solve the sliding puzzle. Get the last piece of the puzzle from the globe on the floor. Tap the globe rapidly to break it and reveal the last piece/tile.

Level 47.
Tap all color tiles, once for each tile.

Level 48.
Tap the square buttons to switch the numbers. The number indicate how many turns does the color gear rotate in on direction.
Top left: 3. Top right: 4. Bottom leftff: 3. Bottom right: 4.


Level 49.
Tap the torch to light it and reveal the hints on the wall. One round shape means one tap.
Tap the drums quickly from left to right in this order: 2, 3, 1.

Level 50 challenge room.
Collect animals and get 60 points avoid ninja stars.

Level 51.
Tap the shake the pot to reveal the ball. Lift up the cabinet to find the spring. Press the ball and spring from your toolbar. Move the spring to the left aiming for the lever. Tap the ball and slide down then release.

Level 52.
Pull the rope to show the wrecking ball. Blow on your phone's microphone. Pick up the knife and press it in the toolbar.
Cut the rope then tilt device so that the wrecking ball will trigger the lever.


Level 53.
Trace the line in just one continuous stroke. Start forming the inner star then the outside star.


Level 54.
Switch the trigger on the floor. Drag wood pieces to corresponding cages.
1 triangle on cage 1. 2 round objects on cage 2. 3 squares to cage 3. 4 rectangles to cage 4.

Level 55 challenge room.
Play memory game.

Level 56.
Slide wood plates (1 on the floor and 2 on the ceiling) to find spitball. Pick up the spitball and press it in your toolbar. Remember the numeric orders and patterns and press the spitball again to close it down. Move the flower quickly in this order: right, down, up, left.

Level 57.
Pick up the broom. Tap the newspaper on the floor and pick up the rag under it. Use the broom on the spider until it goes away. Use rag to clean the door off cobwebs.

Level 58.
move the 3 sliders to proper position: left, right, middle. Press the switch.


Level 59.
Move the left gear to contact with the other gear and blow on your device's microphone for 5 seconds.

Level 60 Challenge room.
Tap the gears from smallest to largest.

That concludes our exhaustive Escape Action walkthrough, solutions, cheats, hints and guide which I hope will help you out in making progress with your game.

Saturday, November 16, 2013

Douchebag Beach Club Cheats

Douchebag Beach Club is a new point and click game which simulates the life of someone trying to achieve maximum doucheness on the beach. In this game, you may or may not learn how to increase body mass for no reason, meet other douche guys and meet chicks on the beach.

However, it can really be such a pain in the neck getting cash and working out your muscles to achieve your pointless goals in this game. So I prepared a list of cheat codes which you can use to expedite the process of getting things done. But first you have to make 6 swag points by buying items in the shop. Once you have swag points of 6%, you can then proceed to banging the first fashion chick. After successfully banging the fashion chick, the option to cheat will be available in the pause menu and you should be able to enter the codes below.
Douchebag Beach Club cheats.
DEPOSIT - You'll get 200 cash.
INCREASE - Muscle Mass gain x 2.
COUNTRY - Country-Music to the max.
PICS - Unlock all pictures.
That's about it for all the Douchebag Beach Club cheats that will surely get you ahead of your game.

Thursday, November 14, 2013

Haunted Manor 2: The Horror Behind the Mystery App Walkthrough

Haunted Manor 2 app aka HM2: The Horror Behind the Mystery is a dark themed point and click game for mobile. The game is available on both iOS and Android and can be downloaded for free. It appears to be just the trial version and the full game is yet to be released. However, the trial version still presents a challenging puzzle to solve and is definitely worth your time.

Like I've mentioned, this game presents a significant challenge in terms of being a brain teaser so I figured that maybe I could help you out in solving it. Below is the Haunted Manor 2: The Horror Behind the Mystery App walkthrough which will give step by step instructions in beating the game.

Go to the gate of the cemetery and look for a bent metal bar on it. Tap and drag the bent metal bar from the gate to obtain it.

Next thing to do is go to the trapdoor left of the house. Use the metal bar from your inventory on the lever slot of the trapdoor. Once you have the metal bar in place, click on it to open the trapdoor.

You are now inside of a dark tunnel at this point. When lightning illuminates the tunnel, tap on the metal bar on your right to obtain it again. Click on the glowing light at the end of the tunnel to get to a partly shattered wall.

Use your metal bar a bunch of times on the bricks to break them so you can fit inside.

Once you are inside the room, collect the wooden stool, the round object on the floor beside the locker, a lever near the mattress and a light bulb in between the pipes above the shattered mirror.

Inspect the switch and put the bulb, the lever and the round dial in their place.

Haunted Manor 2 The Horror Behind the Mystery app walkthrough.

Examine the papers on the wall and not the 4 numbers in it (9573). Use those numbers on the power switch then pull its lever to activate electricity inside the tunnel.


Go back to where you get the bulb and use your metal bar to extract the two pipes.


Go back outside and into the tunnel then use the stool to reach the rope from the trap door you fell from.


Since the tunnel is all lit up, you can now see another path to the right. Go there and use the two pipes you have with you to make a makeshift bridge.

Use the rope and metal bar to bent the bars. Put the rope first then your metal bar and twist it to bent the bars.

Inside the room, inspect the statue in the wall and get the key behind it. Use the key to open the door on your right.

It is the storage room full of old canned goods and a weird teddy bear with number 7 on its chest. Beside the teddy is rounded object which appears to be a numbered wheel. Get it then go to the numbered wheel puzzle beside the other door. Place the numbered wheel in the middle of the puzzle and arrange them in the order exactly like the one below.
Numbered Wheel Puzzle Solution to Haunted Manor 2 app.
Basically, you just have to make sure that all two numbers that meet must add up to seven. When you have done it right the puzzle will glow red. Go to the statue and press the button on it which will open the other door.
The last puzzle is relatively easy to solve. Just make it to what exactly shown in the photo below - a picture of dragons breathing fire.
That's all about our Haunted Manor 2 app walkthrough solutions and I hope this solves all your problems in the game.

Monday, November 11, 2013

100 Doors Aliens Space App Walkthrough Level 30-40

Below is a written guide for levels 30 to 40 of 100 Doors: Aliens Space Android app by gipnetix games. Other levels are covered in another post.

Level 30:
Click on the case in your inventory to throw the keys on the floor.
Drag all of the keys to a press machine.
Push the yellow button to receive big green key.
Drag the big green key to the keyhole.

Level 31:
Click the code panel and using the hint (2), enter the code: 8135.
Other elements in the room are there just to distract you.

Level 32:
Take the picture from the wall and put it on the machine by tapping on it.
Tap the red button 4 times then put the punctured picture on the lamp to see the clue on the wall.
Tap the panel and enter the code: 5137.

Level 33:
Your goal in this level is to guide the robot through the tube and to the red button.
Use the orange navigation buttons to direct robots movement. Robot passes 8 sections in one move.
You can see the distances and directions on the map. Be guided by it accordingly.

Level 34:
Tap on the bottom right ray of light to pick the pliers and use it to open the box at the top.
Cut the wires using the pliers then light the lamps in order that is displayed in the picture below:

100 Doors Aliens Space app walkthrough.

Level 35:
Switch the discs to place all the purple marks on the 12 o'clock position.
Click the on the bottom right disc only once and tap the top left disc twice.

Level 36:
Drag the robot to the left and place right under the box.
Press and hold down the push button so that the box opens.
Collect the key and use it on the door.

Level 37:
In this level, you need to set the value of indicators on the right for all the balls to stop their rotations simultaneously.
Set the value indicators like in the picture below then push the button on the door.

100 Doors Aliens Space walkthrough level 30 to 40.

Level 38:
Determine the code by calculating the points between the planets on the star map. Each direction correspond to one number in the code. The same directions are being added.
The sequence of the code is displayed by the directions above the door.
Tap on the code panel and enter these codes: 091051374.

Level 39:
Tap on the arrows to drag the construction equipment down.
Click on the red button to deactivate energy field around the key. Collect the key and use in onto the keyhole.

Level 40:
Fill the reservoir with enery. The capacity of a reservoir is equal to 100 points.
Next, use the disc launching machine in which the discs are inserted to fill the reservoirs.
Discs differ by energy capacity: Disc with one black line on it = 17 poins. Two lines = 63. Three lines = 34. Four Lines = 50. Five lines = 83. Six lines = 43. Seven lines = 37. Eight lines = 23. Nine lines = 50.

There are more levels coming up for this game and rest assured that I will feature more of 100 Doors Aliens Space app walkthrough for upcoming additional levels.

Sunday, November 10, 2013

Escape Game Hospital Escape Android walkthrough

Escape Game Hospital Escape is another new brain teaser puzzle game from Neodots Creation for Android devices. The game is a first person view and is set inside a locked down hospital. What you have to do is find clues, codes and items that will help you solve puzzles as you progress.

While this game is as simple as it may seem, it can be pretty challenging even for seasoned escape gamers. It's fund and challenging but nevertheless, I got it completed. Here's a written walkthrough guide for all of you.

Go to the drawers in the first room and pick up the battery.
In the same room, examine the wall clock and get its battery as well.
Get out of the room and pick up clipboard/logbook on the floor by the plant.
Go to the counter and pick up the remote control. Go back to the first room and combine the the batteries with the remote control.
Use the remote control on the television screen. Take note of the numbers that will appear on the top right corner of the TV screen.
Use the code from the TV to solve the number panel on the pantry. Once you enter that correct numbers a key will be revealed from the coffee dispenser.

Escape Game Hospital Escape Android walkthrough.

Use the key to open the store room. Inside the store room, collect the doormat, rod, hammer and green surgical mask.
Hospital Escape Game

Go to the staff room door and place the door mat on the floor.

Use the hammer on door's glass pane then use the rod to make the key fall off. It will fall on to the rug.

Use the key to open the staff room. Inside the staff room, collect the blue apple then open the medicine refrigerator using the number on your pink logbook.

Obtain the orange chemical from the refrigerator. You will need it for later.
In the same room, pick up a purple book from the bookshelf. The purple book contains the number code that will open the first aid suitcase.

Inside the case is a key which opens the green cabinet.
The green cabinet contains laboratory coats. Pick up the third coat and inspect its breast pocket to get another key.
You may wear the coat and mask so that you will look like a doctor. Now go back to the refrigerator and open the small box inside it using the key you got from the coat.
Inside the small box is the key-card needed to open the exit.
Go back to the front desk/counter and open the middle drawer on the left using the key from the blue apple.

Collect the piece of crumpled paper and straighten it. When it's all straighten up, pour the orange liquid on it to reveal the final code.

Use the key card and code on the staff only exit and you are done.

That's all I have for the written Hospital Escape Android walkthrough and if you want more spoilers or prefer watching than reading, check out my video below.

Friday, November 8, 2013

Bitzy Blitz walkthrough: How to get more rubies

Bitzy Blitz is a shoot em up type of game from wingon studios in which your mission is to save an unknown village from its attackers. These attackers includes but not limited to steam punk airships, tanks and little soldier kids that will stab you while you are mounted on a tiny horse. But don't worry, you have three weapons each with unique type of firepower.

Bitzy Blitz walkthrough.The game is basically a bullet hell and taking out the enemy before they take you out is the best game plan. But to do just that, you will have to wield powerful weapons and that means you need to upgrade your weapons as early as possible but you can't do if you're short on rubies, right? To get more rubies early in the game, you must take advantage of enemies that spawn little fighter planes. Shoot down the planes but spare the airship spawning them. That way, you will be farming rubies for as much as you like.

The image on the right will give you an idea of what I am talking about here. This trick is the perfect if you want to get more rubies early on. If you think this Bitzy Blitz walkthrough helped you please consider sharing it.

Friday, September 20, 2013

Zombo Buster Strategy Walkthrough

Zombo Buster is new strategy defense game from Firebeast. It has zombies in it and a lot of action which often involves a explosions, lightning, lasers and automatic rapid firing projectiles. Your goal in this game is to prevent incomng horde of zombies coming from the right trying get into the doors on the left. As you go further, you will encounter much more stronger and stubborn zombies that you will find difficult to repel. That is if you are not implementing the right strategies and unit management.

Zombo Buster Strategy WalkthroughThis game though has some serious balance issue between damage you can dealt and the hit points of zombies. As a result, as of now the only good combinations of unit that is capable of successfully beating all levels with a three ruby ratings is the one I demonstrated in the Zombo Buster Strategy walkthrough below. In the video you will see that I only needed one type of unit which is the bombarder soldier. Build as many bombarders as possible early on then start upgrading the first two to chief stun then the the remaining one becomes chief repulsor.